


Blade Tunnel Tutorial
An area of light painting photography that I’ve been interested in lately has been creating Blade Tunnels. These photos look like you are looking down a tunnel, heading off into the distance. Whilst this is not a new concept in light painting, I’ve taken inspiration from “futuristic tunnel” graphic art found on internet searches, and the old skool video game wipE’out”. Usually, Blade Tunnels are created in a studio setting with a black backdrop, but can be also be created outdoors. This tutorial takes a look at how to create a Blade Tunnel.
Light Blades and Flashlights
Firstly, you need a light blade, connector, and flashlight (torch), though other light emitting devices (such as an LED ring) and no light blade can be used. A circular lightblade is the obvious choice, but I’ve also had great success with diamond and rectangular shaped blades. In fact, any light blade with enough surface area to cover a camera lens can be used to create Blade Tunnels. To avoid strange artefacts, a blade with minimal scratches on the surface is preferred. Stacked blades, either using the same light source (such as using the Liteblades KYO system) or two light sources (such as using two LPB Plexiglass tools) can create interesting effects. I’ve even tried three light sources, but the result was a bit over the top!
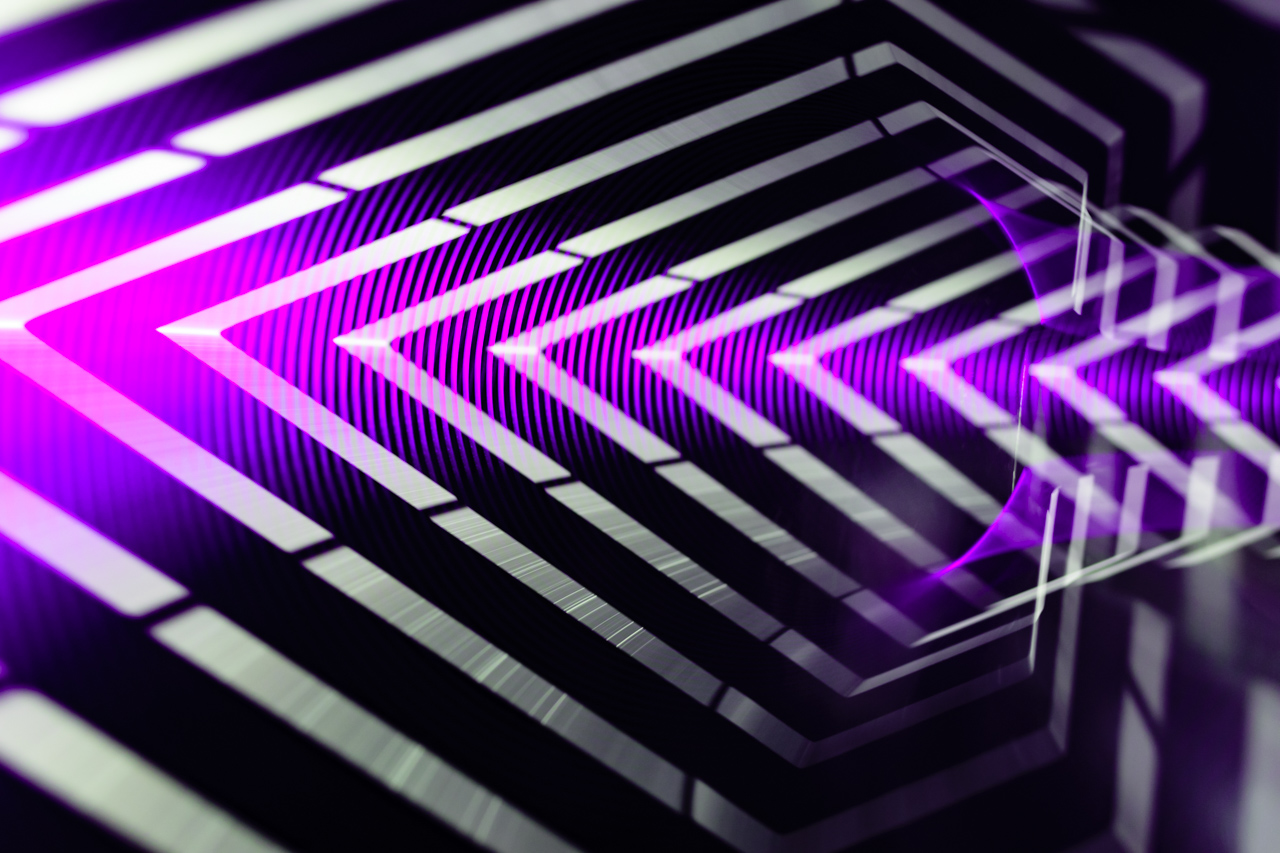
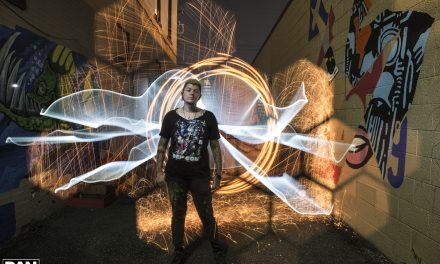
Double stacked LPB Plexiglass Diamond and Circle. Strobe and PWM effects used.
The edge of the light blade can be modded to create the desired tunnel effect. This can include coloured cellophane or gels, or using ink on the edges. Sharpies are a popular choice for ink, which can easily be removed with magic eraser, though sometimes some sanding may be required for stubborn stains. Using ink will allow for more intricate patterns, and is also faster to apply than cutting out and sticking down cellophane and gels. The amount of sanding of the blade edges will create a brighter and more solid effect if a course sandpaper is used (e.g. 60 grit), and a less bright but more glassy effect if smoother sandpaper (e.g. 1200 grit) is used.
The flashlight mode is also critical in creating an artistic image. A continuous light mode will create smooth light trails. Strobe modes will result in rings. Higher frequency strobes (such as 20Hz strobes on some Ledlenser lights) will create more tightly packed rings than slower strobes (such as around 10Hz, which is found on many flashlights). Lights with dual frequency strobes are not much use here. Bike flash mode on Convoy lights with Biscotti user interface creates an interesting burst of four bright flashes. Pulse Width Modulation (PWM) will create a stuttering effect, that lends itself well to Blade Tunnels – I often utilise the PWM from low mode in the Ledlenser P7QC. Colour changing lights such as the Color Shine Flashlight which has slow RGB PWM can create interesting light trails.
One of my favourite light sources for Blade Tunnels is the Concentrate by Threeworlds C5 RGB LED Light unit. The C5 can be programmed to create a large array of multi-colour effects – 4 colour fast strobe effect being very effective for Blade tunnels. Flashlights with a floodier beam profiles also help create more even illumination of the blade edges, which is more critical for creating Blade Tunnels than in light painting katas.
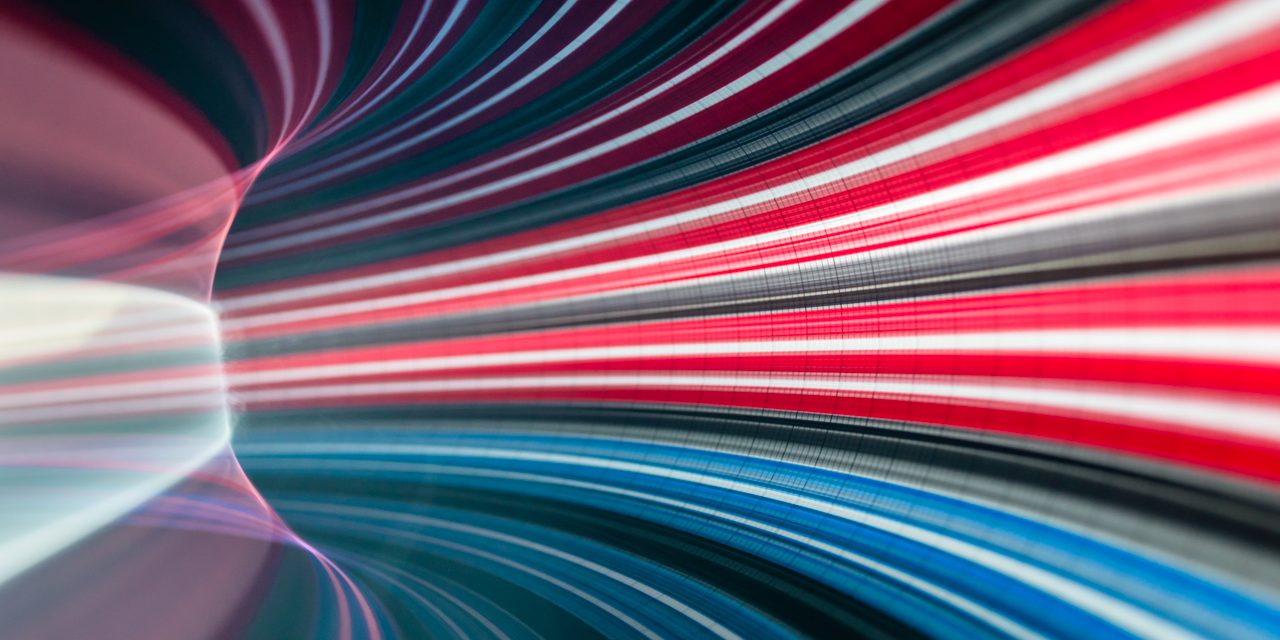
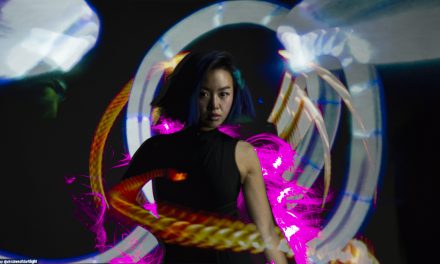
Light tunnel created using the Concentrate C5 light source, luminous Sharpie pens, and LPB Plexiglass Circle.
Camera Settings
So onto setting up for the photo. A range of focal lengths can be used, I typically use between 28-50mm at 35mm equivalent. The focus point is a bit trial and error, and usually between 30 to 40cm from the lens. I prefer to put the lens into autofocus mode, focus on the illuminated light blade, and then lock the focus point by switching back to manual focus. To add a sense of depth in the photo (e.g. out of focus foreground and background) I would advise using a relatively wide aperture. I most commonly use around f/5.6 on an APS-C camera. Time will vary on your desired outcome, but most of my Blade Tunnels use 1.6secs. ISO will need to be varied to get an optimal exposure.
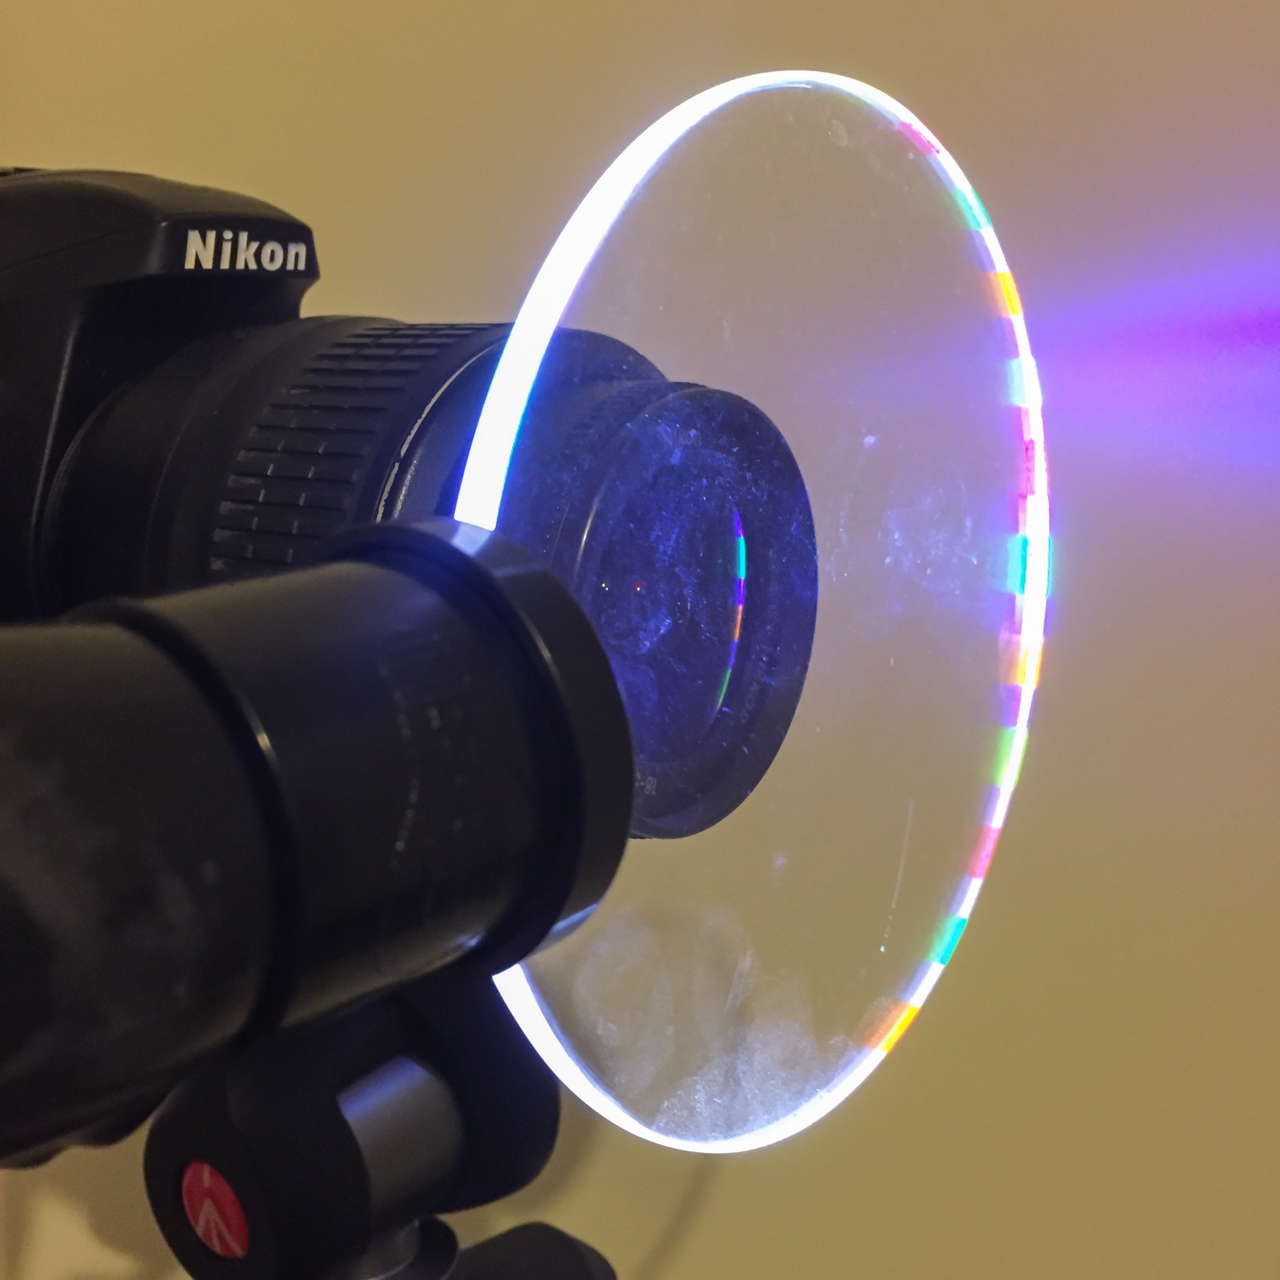
Starting position for a Blade Tunnel.
Movement
Now it’s time to take a photo, and move that light blade. I use a remote shutter on a 2 second timer. The blade is held (usually by an outstretched hand) with the flat side (not the edge) of the blade facing the lens. The edges of the blade(s) should be outside of the lens field of view. As soon as I hear the shutter mechanism open, I move the light blade away from the lens. Most of my movements are in an arc. However, sometimes I might position myself closer to the camera and add a twisting motion (such as in my Black Hole series). Twisting the light blade on it’s long axis can also create interesting (non-tunnel) effects. If you want a smooth (non-shaky) movement, you need to move your arm fairly quickly, or at least concentrate on your arm movements through the air. It is normal to take many attempts until you are happy with the exposure, focus, and movement.

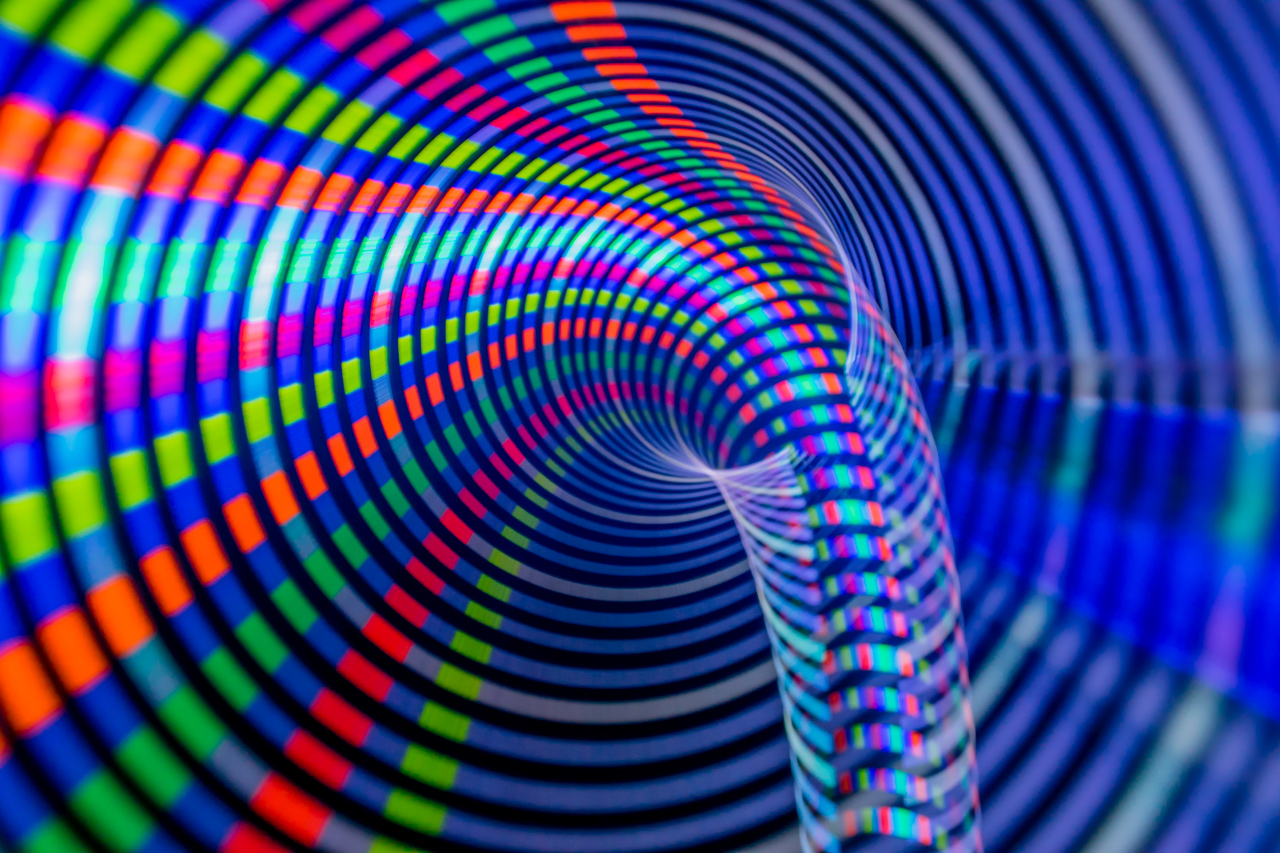
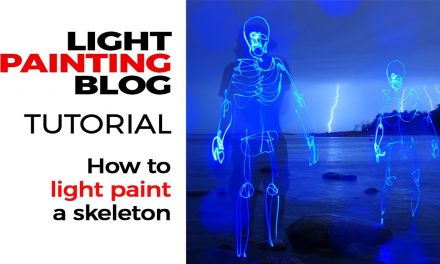
Rotating a Denis Smith made Arclight – Fireblade on its long axis during the exposure.
Whilst I have found that “Straight Out of Camera” images can be half-decent, Blade Tunnels do often lend themselves to some global, and occasionally local level adjustments in post-processing. If there are scratches on the blade, an increase in contrast or use of de-haze can reduce the “ghosting” effect.
There are so many possibilities with creating Light Tunnels. It is also possible to add other light painting elements in the background (taking into account the focus point), plus it also lends itself to lens swap photography and in-camera double exposures.
