


11 Easy Light Painting Ideas to Try as a Beginner

So you discovered Light Painting! Well done! You are officially hooked (or if not yet, you are on your way 😉 Highly contagious and dangerous sport it is.Ever heard of Light Junkies..? 😛
I remember as a beginner I sometimes run out of ideas. Didn’t have many tools to start with, my camera, a tripod and couple of cheap flashlights. I had already tried a couple of stuff but I though I could do much more without more tools, etc. So I turned to the net to get some ideas and inspiration. Although there are some great places to get inspiration, I remember I couldn’t find any of those “top things to do..” kind of lists.
I decided to fix this .. so here it is… ( fanfare: tada aa aaa)
11 Easy Light Painting Ideas to try
- Spin some Steelwool
- Write your message to the world
- Draw something
- Light paint an object
- Use your zoom
- Do an Orb
- Take a light painting portrait
- Do a double exposure
- Reflections
- Macro
- Recreate an epic fight scene from a movie/comic
ok.. let’s break this down a bit.
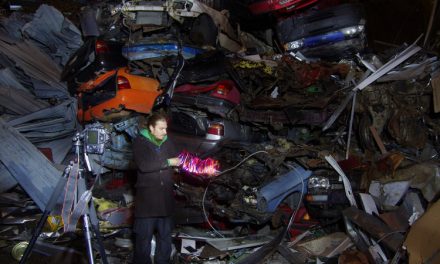
1.Spin some Steelwool
I think that’s maybe the most common way to start light painting. This is how I started at least. It’s easy, gives impressive results and most of all – its FUN!
All you need is some steel wool (the thinner, the better) some way to hold it, and some string or piece of rope to spin it. Check this simple tutorial by Alex’s Photo and Video
Ps: As fun as it is, it’s also playing with hot melted metal.. so make sure you take some caution when you do that!
Here is one of my fist steel wool attempts. Nothing fancy but I remember the chills it gave me!

2.Write your message to the world
All you need is any sort of flashlight and something to say! From hello to your friend to whatever you might want to express, it’s a nice way to say it!
A couple of tips: The camera is facing you, so whatever you write will appear reversed in the camera. This is something that can be learned with practice, but there is also a couple of alternatives.
Easy way: Mirror the image afterward in any editing program. But since light painters ethics says NO PHOTOSHOP ( this is a subject we will cover in the future.. 😛 ) there is another way.
It depends on a bit of the light source you have but can be achieved with most with a bit of practice. You just turn your back to the camera and hold the light towards the camera. This way you can write in the usual way, which is much easier. All you need to figure out is how to switch off and on the light in between letters etc.
3.Draw something
If writing isn’t your thing… try a different approach. Pretend you are Picasso who was just given a light source and draw something! From a simple stickman to abstract masterpieces.. the sky is the limit!

This was an early light doodling of mine using just 2 cheap flashlights (the one with the warm color had a cola cap attached to it..)
4.Light paint an object
So.. Picasso doesn’t inspire you either, or you are more the “behind the scenes” guy or girl..? Wherever is will there is a way.
Place an object in front of your camera, grab your lights and go for it! Anything will do: A vase, a toy car or character. Try different ways… Not showing your light source to the camera, or showing that and leaving the trail. Experiments often bring pleasant surprises!
5.Use your zoom
This is one of my favorites, and for some weird reason, rookies don’t seem to learn this one till a bit later.Or at least I did. All you need is a zoom lens.
Frame any light source in front of the camera. Set your aperture around 11 or even higher ( you ‘ll need to experiment a bit with that ) and start a 10 sec exposure. During the exposure, zoom in ( or out). Try one-two shots to see how it works with the framing. Reframe if needed. Repeat!
Tip: Works better with multiple lights sources, light Xmas lights, city lights or anything blinky.. 😛 Can be nicely combined with Pan and Tilt moves too! Check this one I did a couple of years ago that even got me a price in Jason Page’s Light Painting Photography Contest. It was made using a hula-hoop with some string lights attached to it and just zooming and panning and tilting.

6.Do an Orb
Pretty straight forward here. Get some battery operated Xmas lights, tape them together and your first orb tool is ready for a spin. Need a lot of practice to make good orbs, but it’s fun!
Tip: if you tape some smaller led lights in different distances in your string, you ‘ll get beautiful inner circles at the same time. 😉


7.Take a light painting portrait
Even without those helpful tools, you can do some interesting stuff with another person. Get your friend, partner or child to model for you. It actually is a pretty nice activity to do together! Tell them to choose a pose that they can hold for a bit and frame your shot. Next start the exposure take your flashlight and go behind your model. Start tracing their body with the flashlight facing the camera. It’s an easy way to get some interesting results. Here is one I did playing with my boy.
8.Do a double exposure
Another technique that is easier than people think. It can get more complex of course, but the main idea is easy.
You start the exposure, light up a subject, close the lens with the lens cap or any soft material like a black cloth or a hat, you reposition your subject, open the lens again and light for a second time the subject. Might sound complicated but you can easily do this, especially if you try first to move your subject instead of the camera itself. You can create clones of your friends, or the very popular “many hands God.” Here is a multiple exposure one I did using exactly this same technique in my backyard.

9.Do a “light man” or a “skeleton”
Get any small point-led or glow stick and start tracing your body. Try to stay still, using one part of your body at a time as a reference. Janne Parviainen did a nice tutorial on this. Check it out here
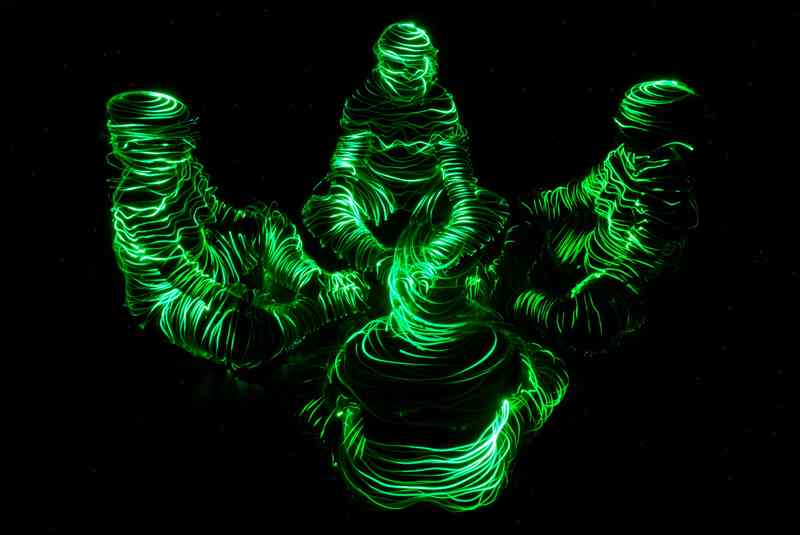
image by Janne Parviainen
10.Macro
You’ll need any macro lens for this. If you don’t have it one, it can also give some interesting results with a simple zoom though. Check out this nice tutorial from Chris Noelle to see how to do this.
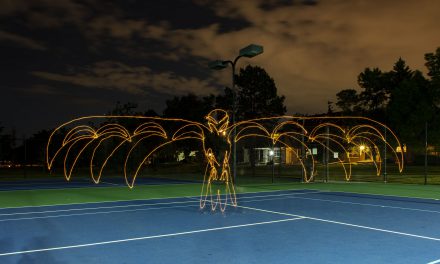
11.Recreate an epic fight scene from a film/comic
You ‘ll need at least one character and some reference from a movie, comic or whatever you like. Battle scenes work well!

image by artwork_rebel
These are just a few light painting ideas to start with. You will soon find out that more ideas come out of trial and error. Don’t be afraid to experiment and try new stuff. Nobody started making great looking stuff immediately. And trust me nobody does great stuff all the time 😉
The main thing is to have fun doing that, enjoy and learn. When you keep on doing whatever it is you are doing, you ‘ll be rewarded by your results sooner or later.
If you have any questions or suggestions feel free to comment and ask. I know this article don’t go much into the details of each technique, but we will be covering some of those with much more information in the tutorial section of this blog.
Welcome to subscribe to get information about new tutorials and interesting articles.
Also please rate this post here. It helps us understand if this is a topic you would like to read about and if it was helpful. Feel free to share it too!
Waiting to see some of your creations! You can use Instagram with the hashtag #lpideas
Have fun! Thanks!


Good article man !