


The Singularity Effect Tutorial
The Singularity Effect Tutorial
(French subtitles are available)
Redde Caesari quae sunt Caesaris
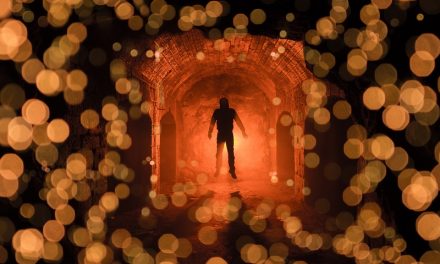
In 2013, the inspiring and very talented Dutch light painting Jelle SCHUURMANS has posted this wonderful picture in the Flickr’s light painting group Light Junkies:
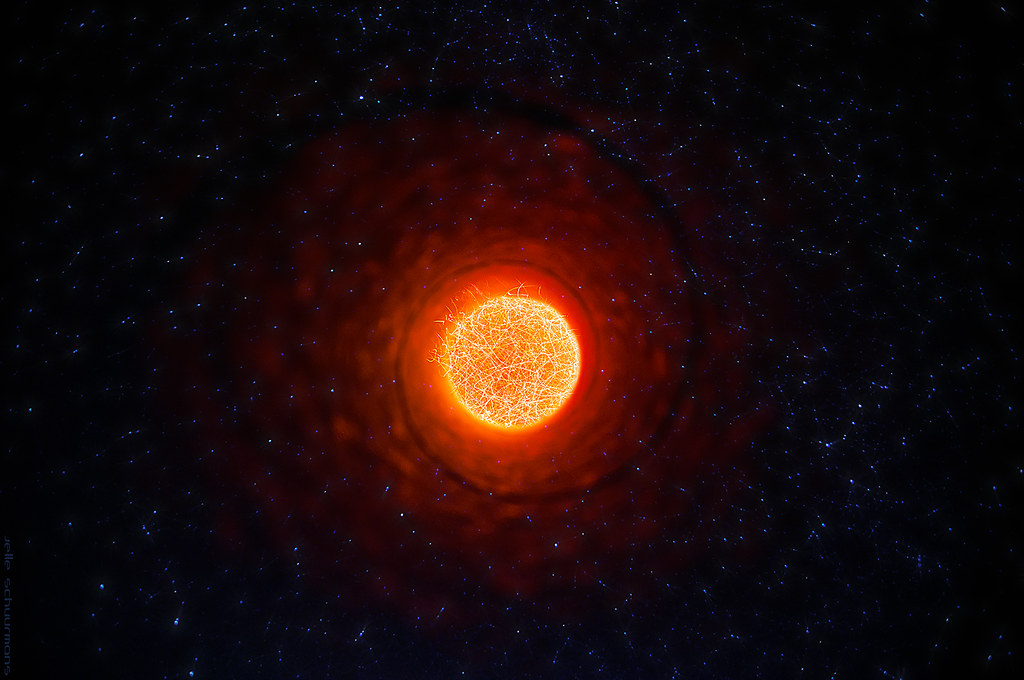
I’ve immediately loved this picture, and I was wondering “How the hell did he achieve this effect?”. This question has scratched my head for weeks, and, one day, an idea has popped out “what if I do this and that and then…?”. A few experiments later, I still had no clue about how he has achieved his effect (and I still do not know exactly how he did it), but I’ve found something slightly different, but similar.
Here is what I’ve found so far…
The material I use
To achieve this effect, I use :
- a piece of white fabric
- a black cardboard panel
- a blue gelled flashlight
- an orange gelled flashlight
- a sparkler
- a cardboard tube (approximately 50 cm / 20 in)
Any tube with a clear/light inner surface can be used for this: Pringles tube, kitchen towel tube, poster tube, … If the inner diameter of the tube fits on your favorite lens -or on your lens hood, the nirvana is close.
Step 1: Creating the Singularity
- I start by framing the whole scene.
- I put the lens inside the tube. The idea is to have the tube around the lens, as straight as possible.
- I set the focus point to the end of the tube, and I set the aperture to f16.
If the lens does not have an aperture ring to change the aperture during the exposure, then I screw a 2-stops Neutral Density (ND) filter on the lens (and it’s far more easier to do this without the tube on the lens). - I turn off the light, and I start the exposure (Bulb mode, ISO 100)
- I light the sparkler, and I move the sparkler all around the tube, close to the open end of the tube.
I take care to keep the burning point of the sparkler hidden from the sensor, I want only the sparks to be visible from inside the tube, not the burning point.
One or two rounds around the tube are usually sufficient.
(The sparkler is basically burning metal, so it’s very hot. And hard to blow out. Keep it safe: don’t burn yourself, or the tube, or the whole place) - Once the sparkler is off, I hold the piece of white fabric in front of the tube, at approximately 10cm / 4in of the end of the tube. And I quickly light the fabric with the blue gelled flashlight.
As black is not an information -it’s a lack of information for the sensor, this blue light is going to fill the dark areas amongst the sparks. - I remove carefully the tube from the lens
- I switch the focus to the background distance
- I switch the aperture to f8 (or I remove the ND filter from the lens)
Now, let’s give a size and a location to this baby.
Step 2: Locating the Singularity in the scene
I’m going to use the orange lighting to trick the brain of the viewers and to let them think that the Singularity is “there” and has “this size”.
A bit of theory first
The location and the size of a light shape (whatever the light effect is) in a two-dimensional picture it is not given by the light shape itself. It is given by how this light shape is lighting the context / the reflective lights / the shadows / etc. If I write the word “Hello” with a small led at 50cm/20in from the camera or if I write the same word with a drone in the Grand Canyon, these two images will look exactly the same if there is no context visible in the final image. And even if the context is visible, there is no clue about the size and the exact location of the light word if there is no reflective light coming from or shadows generated by the light shape.
So I’m going to simulate the light that the Singularity would have emitted from the exact point where I want it to appear. If I want the Singularity to appear “there”, then the light should come from “there”. The intensity of the light should fade away with the distance from “there, ” and all the “obstacles” in the scene should be brighter on the side which is turned towards “there” and darker on their back side. And the shadows generated by these “obstacles” should all lead to “there”.
let’s get back to it
As the tube is fixed on the lens, the Singularity will probably be right in the center of the frame. But I have to decide at which distance of the camera I want the Singularity to appear in the final image. I usually prefer to have the Singularity in the background.
So I walk -in the dark and in the axis of the camera- to the exact distance where I want the Singularity to appear.
At this exact spot, I use the orange gelled flashlight to light the whole scene. I use the black cardboard panel to hide the light source from the camera while lighting. I do not move around the scene while doing this orange lighting because it would kill the consistency: I light the whole scene in orange from “there”.
Once it’s done, the Singularity effect by itself is achieved.
The dark areas (shadows, areas which not touched by the simulated orange lighting, etc.) can be filled-in with a different color or a less powerful light source to get details in these areas too.
Tips
- If you have a zoom lens, the focal length can be changed between the tube part and the rest of the scene. This way you change the ratio between the size of the Singularity and the rest of the scene.
- If the tube inner color is bright, it creates a bigger aura around the sparks circle and this aura may improve the feeling of an irradiating light source
- The simulated lighting to give a size and a location to the effect can be used for other light shapes and in other contexts.
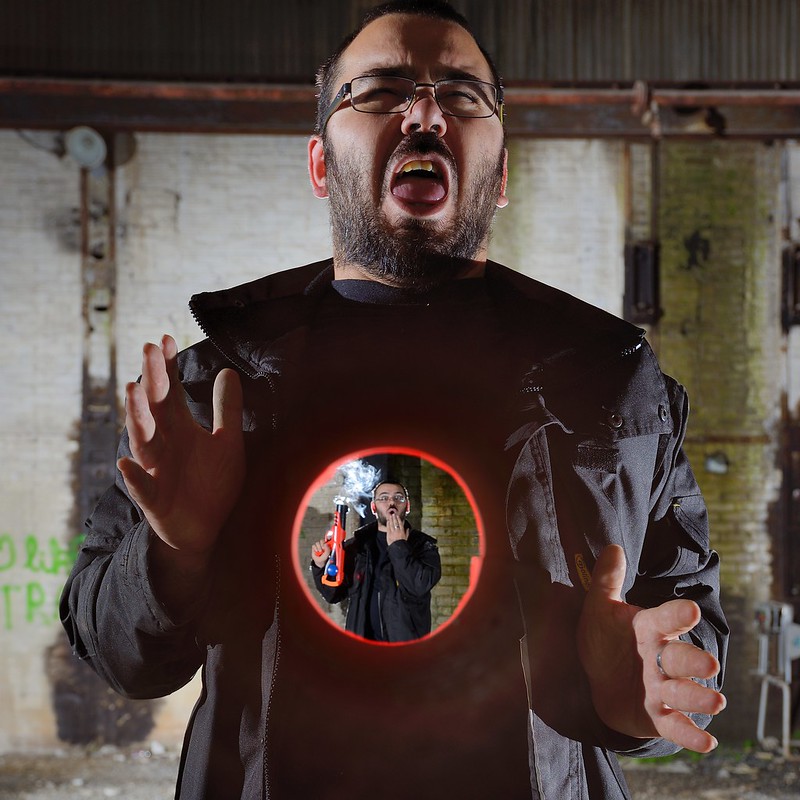
For instance, here is another usage of this simulated lighting:

We did not use fire for this picture and the real size of the flame is 5cm / 2in wide. It was a picture displayed on my phone (used as a stencil), close to the camera. The simulated orange lighting helps the brain to believe that the flame is big and right in front of the model. - The tube technique can also be used for different effect, of course.


Questions/remarks
Hit me…

