


Tutorial: Large Scale Stencils

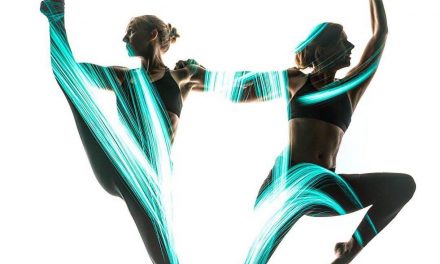
There have been some pretty impressive light painting shots made with stencils. Recently I had the opportunity to meet up with Gareth Nathan who has done some pretty amazing recent stencil work. That same weekend finally burst my resistant steel wool bubble as I got a chance to try something a little different in a steel wool shot. When I got back to Denver I decided that steel wool was enough fun that I wanted to do some more of it. But as a portrait photographer who also likes to make light painting tools I wanted to put my own unique twist on it. You’ve already seen the resulting shot, above, and since I had several people ask me about it I thought I’d do a write-up on how it came together.
Mixing Two Realities in a Shot
Stencils are cool that way, letting you shoot exactly the same angle from an unmoved camera for two or more areas of effect within one exposure. I cut my first few stencils by hand and they worked out okay. One day I was preparing to cut my most ambitious stencil and Nancy looked at me, partly in shock and with a look of “that’s so inefficient and I can help you do it better”, and asked why I wasn’t using her Silhouette Cameo cutter. The cutter would make cuts with much more precision, and completely hands-off. Patterns that would have been an absolute pain to do by hand were suddenly within reach.
The following image shows two of the first few stencils I made with the Cameo. The stencils are mounted onto transparency paper in order to hold the floating pieces in place. A nice aspect to cutting stencils this way is that you can take the pieces that you cut out and make a negative-space version of the same stencil! Two cuts turned into four different stencils! In this shot all of the stencils are on white paper to show them off. The white paper can be used when shooting to fill the stencil or can be removed to allow the background, or light to pass through the stencil.
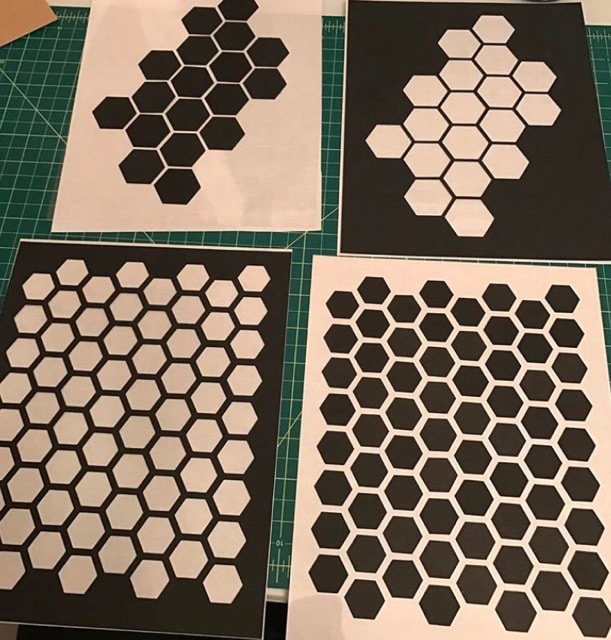
Stencils cut by the Cameo
Setting up the Shot
I got together with Geoff Decker of Hidden Vision Photography and we brought Morgan Brianne to Cabal Gallery. Mar Williams, one of the founding members of Cabal, was there to greet us. We set up in the alley adorned with wall art from Cabal artists.
The first step was to get our gear set up; first the camera on a tripod and then the stencil on a second tripod. Here’s what my camera was seeing at this stage.

Looking through the stencil
Adding Fire
The next step was to test the stencil in order to make sure we were actually going to get what we expected. Geoff fired up the steel wool, Mar stepped into the shot and we ran a test. This shot shows the result of Mar’s silhouette combined with the steel wool, through the stencil.
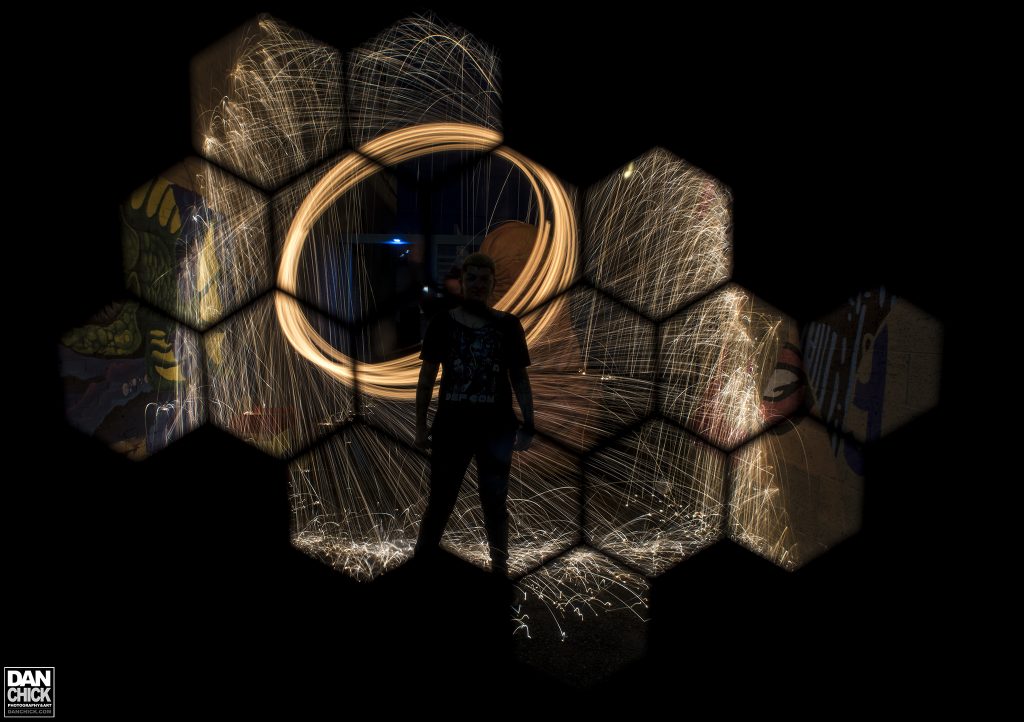
Steel wool through the stencil
Putting it all Together
We shot a few with Mar, then a few with Morgan, then a few more with Mar. The title shot was the second-to-last one we shot after we’d figured out the right choreography. Here’s how the dance went down:
- Set up the stencil. We moved it each shot so this had to repeat.
- Everyone in position! Stay still until the shot is over!
- Light the steel wool, do a couple of rotations to get it going
- Open the shutter
- Capture about 8 to 10 rotations. These are entering the camera through the stencil.
- Cap the lens
- Remove the stencil.
- Add some extra light to the scene and light the model.
- Leave the shutter open long enough to add the desired amount of ambient light to the parts of the shot the stencil was previously covering.
- Close the shutter
Give it a go and leave a comment or shoot me a message if you use this technique. I’d love to see what you create with it!
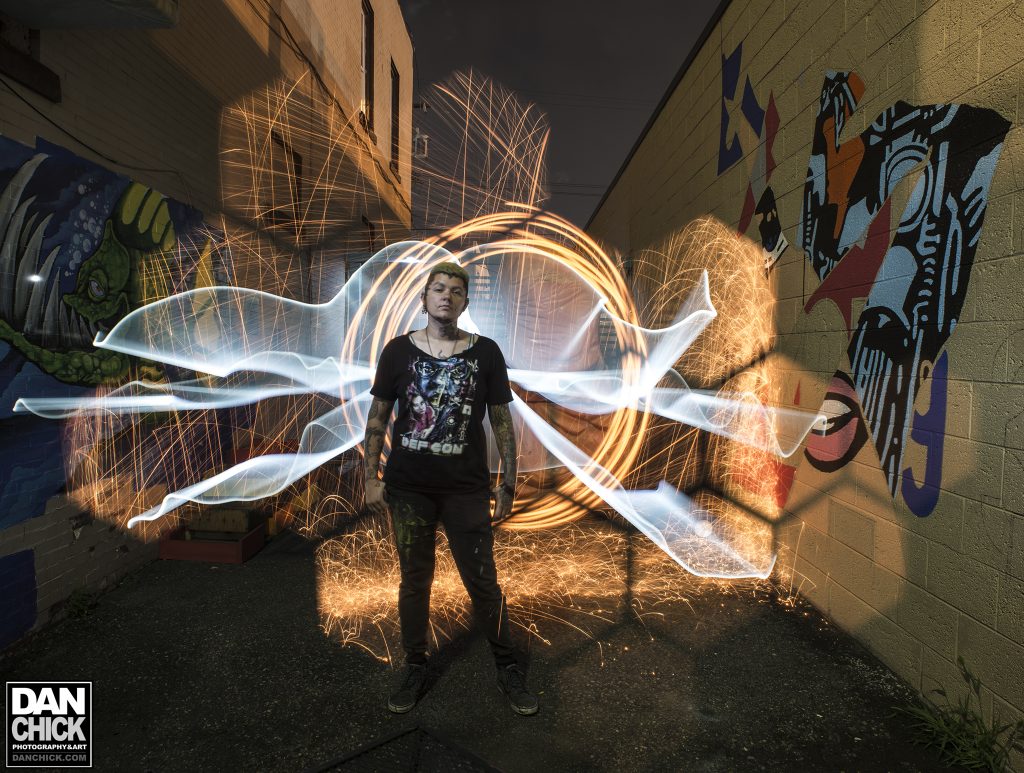
The final shot
SaveSave

