


The Dark Art Of The Lens Swap

Hello and welcome to the follow up from my last post “The Art Of The Tripod Swap”
with the snappily titled The Dark Art Of The Lens Swap.
After seeing incredible work by James De Luna, Mart Barras, Quornflake, Tackyshack and Ectro in this field, I knew this was an area of lp I wanted to explore. The creative avenues this technique opens up are mind blowing and will help you create images which further twists reality and push the boundries of what can be achieved.
Why Swap Lenses?
Firstly for me was being able to force two or more different perspectives together into a single frame. A recent shot I had in mind involved going from a macro shot of an eye to a wider angle shot of my friend stood behind a diffuser. This enabled me to increase the size of the eye and decrease the size of my friend making it look as if he was trapped inside the eyeball. All in one shot! Cool Eh?
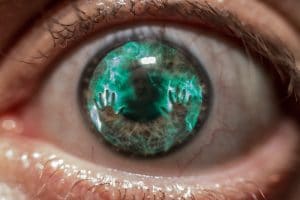
Mid-exposure lens swap from macro to wide angle
Secondly having two different apertures to play with in one shot can come in really handy especially if you don’t own a manual lens….which you should. If you want to burn steel wool and capture the Milky Way in the same frame then the lens swap might just be for you. You’d set one lens to a small aperture for the wire wool and another lens wide open for the milky way.
Frame Filling
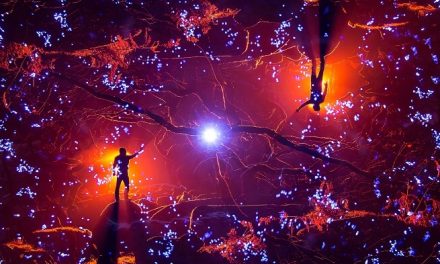
Recently I have been playing with camera rotation of bokeh . On numerous occasions shooting in an old lime kiln the far reaches of the frame were devoid of any interest. I was shooting a levitating silhouette with my Tokina @11mm and exposing for the backlight. The bokeh, created by my Tokina @f8, is non-existent therefore I swapped to my Samyang 50mm @ f1.4 for the second part of the exposure. Sure I could have shot everything on the Tokina @ f2.8 but the d.o.f was too shallow for the look I had in mind and the bokeh nowhere near as beautiful.

Mid exposure lens swap from wide angle to 50mm
One Lens? No problem
You’d think two lenses would be a good thing to have but this isn’t always necessary. You could start off the shot with no lens on the camera like on this shot below. Mixing refract/reflectography (lensless) and a lens of your choice. I’ll stick a link at the end of this post which will take you to a video I created as a breakdown for this image. It will show you both lens and tripod swapping along with some other cool stuff.

Lensless to 50mm
Two Or More Lenses
Most of the time you’ll be using two different lenses, unless you’re James De Luna! In which case you’ll need about twenty 🙂 Two or more tripods come in handy to ensure you nail the alignment of the elements as well. Read my previous post on tripod swapping as these two techniques go hand in hand and should be useful when you come to give it a go.
To save time and your sanity, here’s something I wish I’d have worked out sooner. Don’t attempt a lens swap when you start the exposure with live view turned on. I can’t speak for Nikon or Sony etc but on my trusty Canon the exposure ends when you try to remove the lens when live view is on.
Another great tip which the talented Mr Quornflake told me was to hold down the d.o.f preview button when you remove the lens you are going to use second in the exposure. This locks the aperture to the desired one. If you fail to do this then your lens will reset itself to it widest aperture, generally resulting in a blown out mess. That said this can be used to your advantage as you can effectively use two different apertures from the same lens. Start the exposure at F8 for example, then break the contact between the camera and lens before re-seating the lens. The lens will shift to it’s widest aperture.
Planning
I can’t say I have ever aimlessly lens swapped and always try to think of the following points. What apertures are to be used to best expose? Which focal lengths will work? The composition of both tripods, which order should I shoot in and where will my dead space fall . Quite often you need the first element of the exposure to include an area of dead space. This space will subsequently be filled in after the lens and tripod swap. This part needs planning otherwise things won’t line up correctly, you’ll give up and get mad. Grrr.

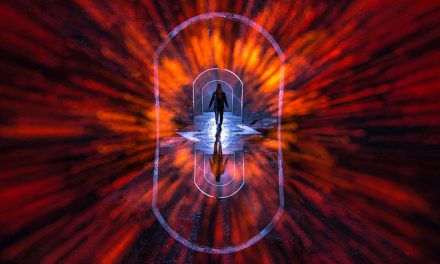
Tripod and lens swap long exposure light art
For this shot I used the 50mm for the profile silhouette. Chosen due to it’s lack of distortion. I chose the Tokina at 11mm for the exact opposite reason. To give an increased sense of scale to the inner figure and the tunnel. This wouldn’t have worked nearly as well had I just used the 50mm or the Tokina.
Run Through
Here’s a quick run through of how a lens swap shot might come together.
Firstly, formulate an idea and work out how best you could achieve your goal. Next, set up your tripods and work out the best exposure. I tend to start with the second element of the exposure,(tripod 2) and once happy I’ll remove the lens with the d.o.f preview button pressed and leave the lens under that tripod with the front cap on. Move the camera to tripod number 1 and put on the first lens. Once happy, fire the shutter, replace the lens cap after a designated time and swap to tripod number 2. An extra pair of hands is always useful to hold lens number 2. Remove the first lens and as quickly as possible seat lens number 2 on the camera. Take up positions and remove the lens cap to fill in the dead space and finish.
I hope I haven’t confused matters and that this has been an insightful post. Best advice is to get out there and give it a go. You’ll soon find what works best for you and start to grasp how different lens attributes can be used to your advantage.
As always leave comments below and I hope you enjoyed my article. Thanks to those who came up with all of these techniques in the first place and these epic artists who inspired me to give it a try.
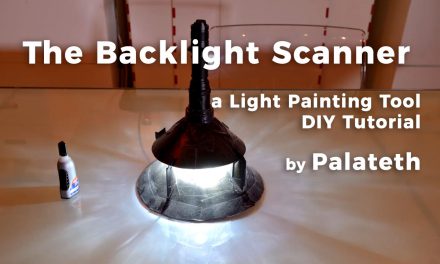
Here is a Youtube tutorial for the image above.
Apologies in advance for my lack of videography skills.
Cheers people and get swapping.
Happy days.

