


LP Tool Review: LPB Light Whip

The Light Whip was introduced to the market by Light Painting Brushes (LPB) during 2017. Being a more heavy duty equivalent to old-skool light painting favourite – electroluminescent (EL) wire, there are many creative opportunities. This review takes a look at the Light Whip and its potential for light painting photography.
Disclaimer
The LPB Light Whip was sent to me from LPB in return for writing an article on lightpaintingphotography.com. I receive no commission from links or sales.
Product Link.
Description
The LPB Light Whip is a 91cm long and 0.7cm thick white fibre optic cable that emits light evenly along its length. At one end of the whip is the plug, that is used to connect with the LPB Universal Connector. This allows for connection with flashlights (torches) with between 2.5cm to 3.8cm head diameter. At the other end is an end cap, which has a light yellow tint when a cool white light source is used. I prefer to store the Light Whip in a laptop case or laptop compartment of a camera bag when out and about.
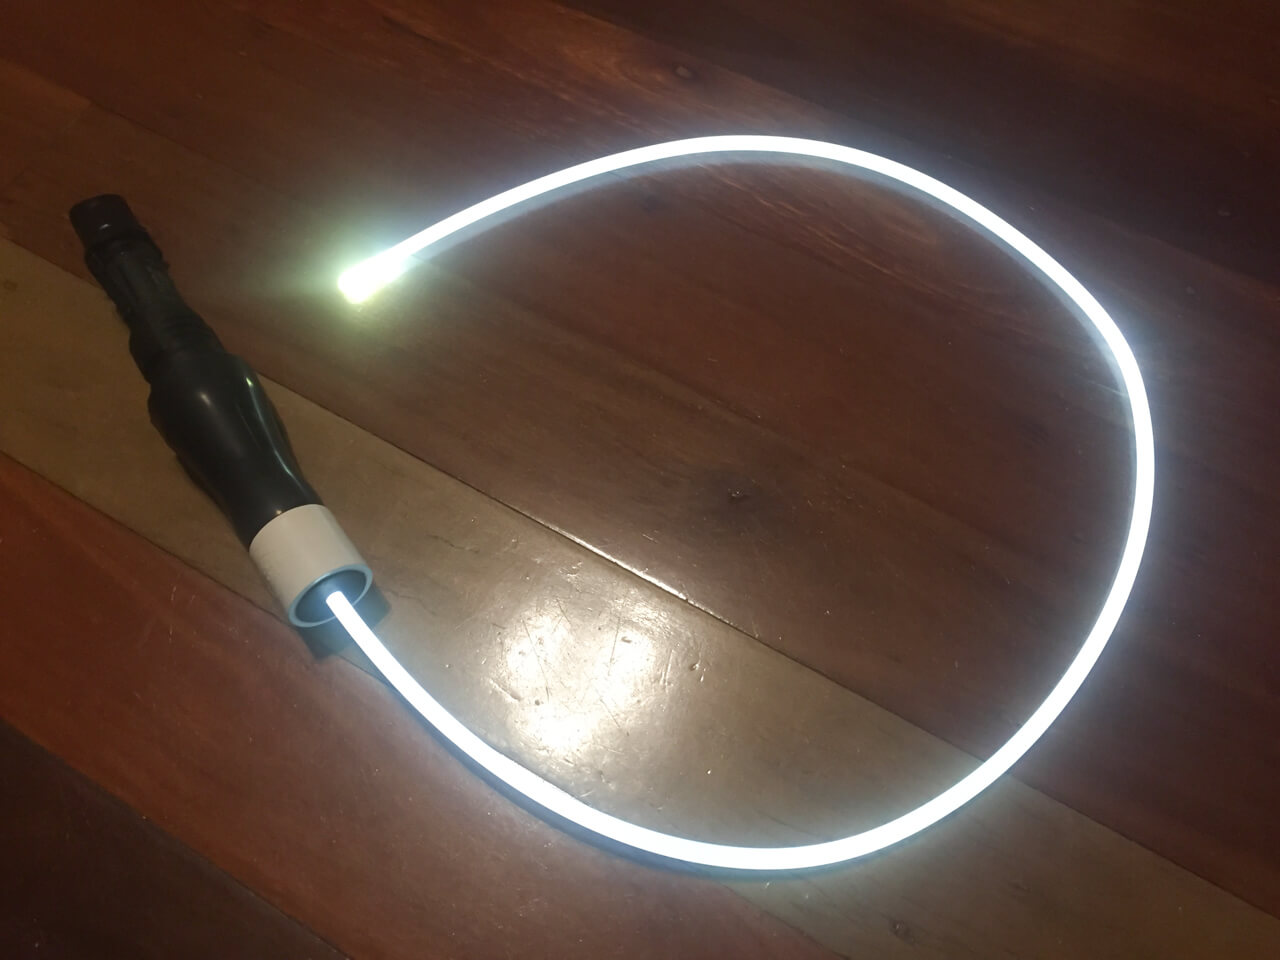
Light Painting Brushes Light Whip.
Light Output
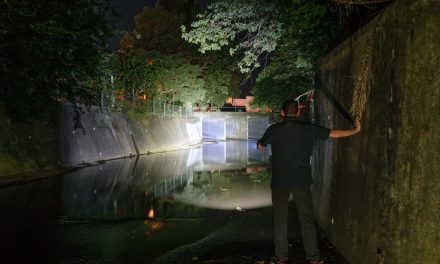
Due to the inherent design of the LPB Light Whip (a side emitting fibre optic cable), it has a low ratio of light input to light output. LPB recommend a flashlight that has at least 400 lumens to illuminate the LPB Light Whip, however the reality is much more complex than this. The Light Whip has a small diameter for light input. Thus much of a flashlight’s spill beam will not enter the Whip. Flashlights with a narrower and brighter hotspot will work much better with the Light Whip. Peak beam intensity, quoted in candela (cd) is hence more important than lumens alone. This is also sometimes quoted as throw (in metres) by manufacturers. If you are looking at buying a flashlight specifically for the Light Whip, I would advise looking at lights with at least 10,000cd, preferably 20,000cd or more. These usually have Cree XP-L (HI) or XHP35 (HI) LED emitters, and smooth reflectors. Lights that fit the LPB Universal Connector, and will make the most of the Light Whip include (but are not exclusive to) to the mid-market Klarus XT11GT (25,000cd), Klarus XT12S (40,000cd), Nitecore P10GT (20,000cd), and Nitecore P26 (25,000cd). At the budget end of the market, the Wowtac A1S (19,000cd), and Convoy S2+ Desert Tan (14,000cd) will do the job well. If you have a zoom flashlight (such as many Ledlenser, Coast, and Walther Pro lights), it is best used towards the zoom end of the range.
Typical exposures that I have used in an outdoor setting with the Light Whip are between f/10 and f/4 at ISO400. It is fantastic to use on a full moon night, and also works well in darker ambient conditions where the light painter has to illuminate the background. It is harder to use in brighter ambient settings such as under street lighting.
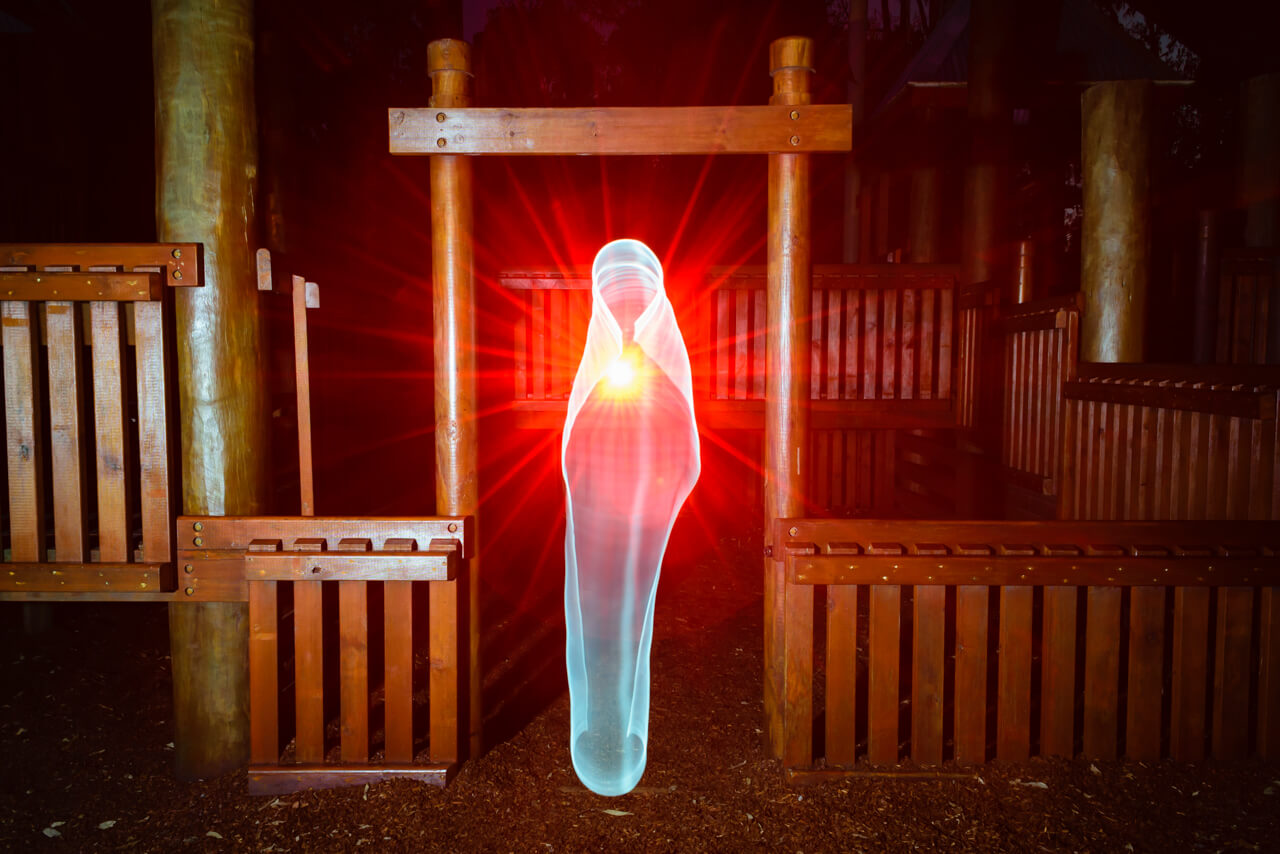
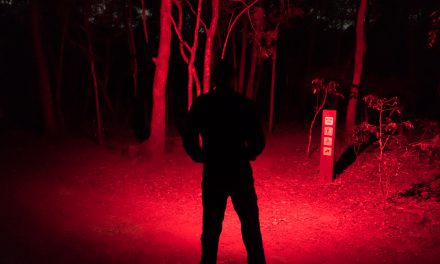
Light Ghost created with a LPB Light Whip and Klarus XT2CR. f/10, 30secs, ISO400.
Despite the above recommendations for brighter flashlights, I have successfully used the Light Whip with the (only) 30 lumen Concentrate C5 RGB LED Light Source in a studio setting (in the article cover photo). An exposure of f/5.6 at ISO1600 was required, but given that even entry level DSLRs (I was using an APS-C sensor Nikon D3300) tend to have great noise handling these days, this is not a major issue.
Uses
The Light Whip by default has a slight curve to it, which differentiates it from straight edged light swords in light painting scenes. It can be flexed into other shapes (such as a figure 8) within reason. I find that the resistance of the Whip towards further flexing tends to tell the user when it can’t be flexed any further. As the Whip is glued into the connector plug it is not recommended to spin it around at high velocity, as the high G-force could cause the Whip to exit the connector. Despite this caution, I have spun it around gently with no ill effect.
The Light Whip can be waved around from one end like EL wire. This created a thicker, more defined version of the classic EL wire mist or wave like effect. You might want to wrap some black tape around the end cap though. However, where the Light Whip comes into its own is that it can be held by hand it both ends. This allows it to be manipulated into a wide range of shapes, with almost unlimited creative potential. Examples of shapes that can be created are ghost shapes, and organic plant like shapes. As the Light Whip is stiffer than EL wire, there is more versatility in the shapes you can create.
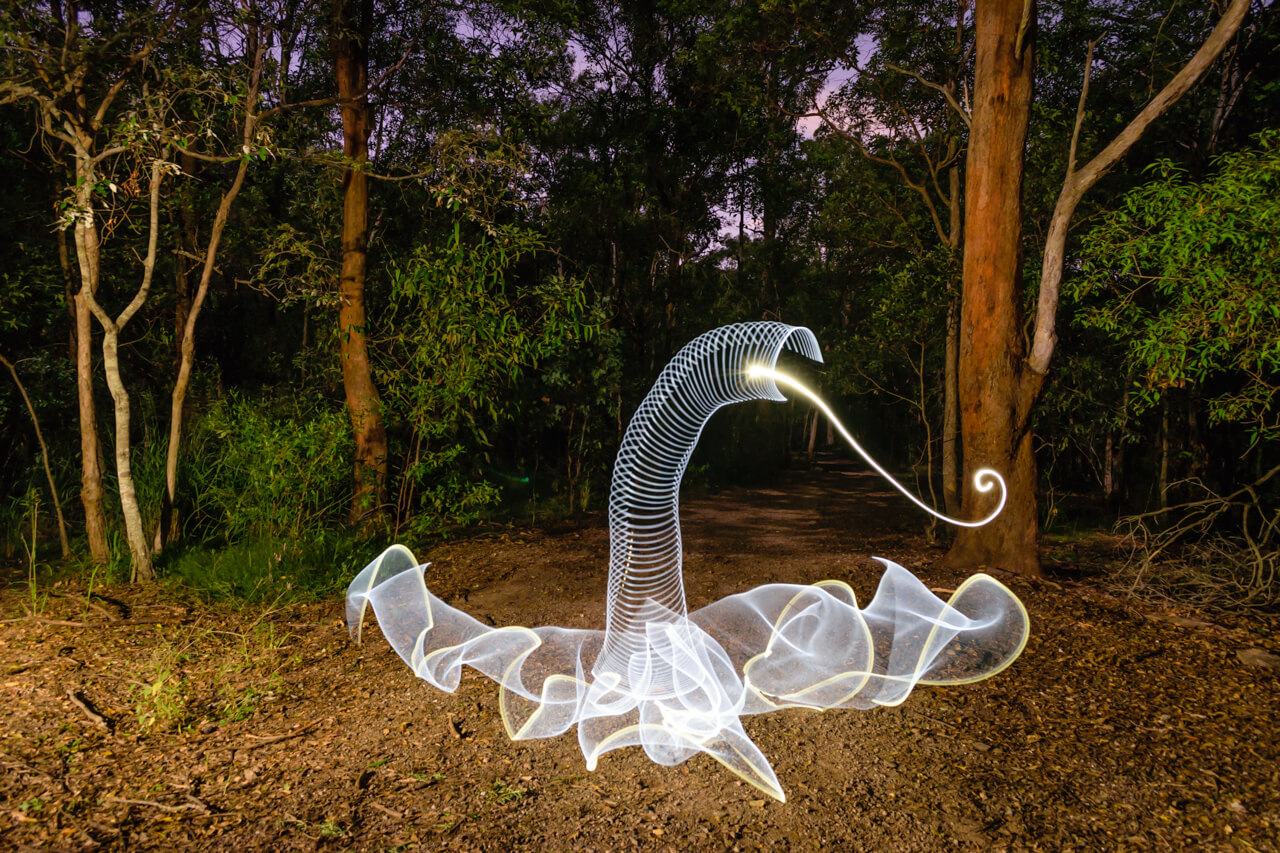
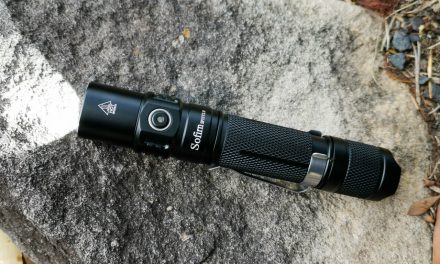
Triffid created using a LPB Light Whip and Nitecore P10GT flashlight. f7.1, 74secs, ISO400.
The Light Whip is only available in a white version (no colour filter). However, the light output can be coloured by using coloured gels or cellophane in the plug, or by using multi-colour light sources such as the Ledlenser P7QC and Concentrate C5. Wide apertures and/or higher ISO will need to be used. Using strobe mode on the flashlight also has creative potential. Further customisation could include wrapping tape (such as electrical tape) or colour gels around the outside of the whip – I’ve yet to see anyone try this out, but intend to soon.
Conclusion
Things I liked:
– Unique light painting product
– Very high creative potential
– Compatible with the LPB Universal Connector, and thus a wide range of flashlights
Things I didn’t like:
– Low ratio of light input to light output – counteracted by using wide apertures or high ISO
The Light Whip creates an EL wire like effect, but being thicker and stiffer than EL wire, makes it more versatile for creating mid-air shapes. To get the best out of the LPB Light Whip, I recommend flashlights with relatively high peak beam intensity or throw specifications, as well as the use of wide apertures/ higher ISO. However, it is still useable even with low lumen light sources in very low ambient light conditions. The Light Whip has amazing creative potential, and I think the light painting community has only scratched the surface of the LPB Light Whip can be used for.
