


Review: Lightroom Alternatives

Light painting photography can require RAW processing software to be pushed to the extreme, as dynamic range often needs to be maximised, shadows and highlights recovered, and colours controlled. Adobe Lightroom is one of the most popular RAW converters for good reason. However many photographers have a dislike of Adobe’s business practices (notably the subscription only model) and are looking for cheaper, but still capable alternatives.
This review looks at my recent experience with trialling Skylum Luminar (2×14 day trials), and ON1 Photo RAW (31 day trial), and how they performed when developing RAW files from light painting photography sessions.
Skylum Luminar
You can’t have failed to notice the heavy advertising for Skylum Luminar (who also make Aurora HDR) on social media, but does the advertising live up to the hype? After a long wait, digital asset management (DAM) functionality was added to Luminar 3 in December 2018. This finally gives a Lightroom style management of photo files. When first starting up Luminar you just need to point it at the relevant location (or locations) of photos – easy. There are plenty of online videos, a manual, and instructional web pages to help with learning how to use the software.
One of Luminar’s selling points is its Accent AI filter that can quickly, and automatically optimise a photo. I found this to work very well in some cases (so well that limited further editing was required), but fall flat on its face with other photos. Sometimes the results (light painting or not) to look a bit over-processed, but this can be scaled back with a single slider if required. Other presets are available, and I found that in some cases I could get an image I’m happy with much faster than in Lightroom. Luminar’s recent Accent AI 2 update allows it to detect human skin (in portraits) and process it differently to the rest of the photo.
Luminar has an excellent range of develop filters, which can be applied globally, as an adjustment layer, as a brush, gradient, radial, or luminosity filter. These cover the usual, such as HSL, sharpening, but also some other interesting effects such as Colour cast correction, Orton effect, and Sunrays filter. If there a set of filters you often use, then you can create a customised workspace which displays your default filter set (you can still add more as required). Using the range of filters, I would say I have a 50/50 mix of getting better images out of Luminar than Lightroom, though if I wasn’t directly comparing, I would be happy with the results from both. The only filter that could be improved is Noise Reduction, which is OK, but not as good as Lightroom’s. If you are often pushing your noise tolerance limits you may need to consider an external noise reduction application as well. Spot removal tools were OK, but again, not as accurate as in Lightroom. There is also a history button. Virtual copies are not available, but are on the product roadmap.
Luminar also has layer / composite functionality. This has a bit of a learning curve, and a few user interface quirks, but once you know how, is quite useful for digital artists. There are brush, radial, gradient, and luminosity mask options, but not edge aware masks. One annoyance though is that when opening a seperate image (rather than adjustment layer) for the second layer, you have to find the file through a OS file browser rather than via the DAM.
Performance (on my late 2013 MacBook Pro 13”) was OK, but not as fast as Lightroom. Since the review, version 3.1.1 has been released which has promised significant performance enhancements. I didn’t experience any crashes during testing. An annoyance is that you cannot do any other tasks during photo export.
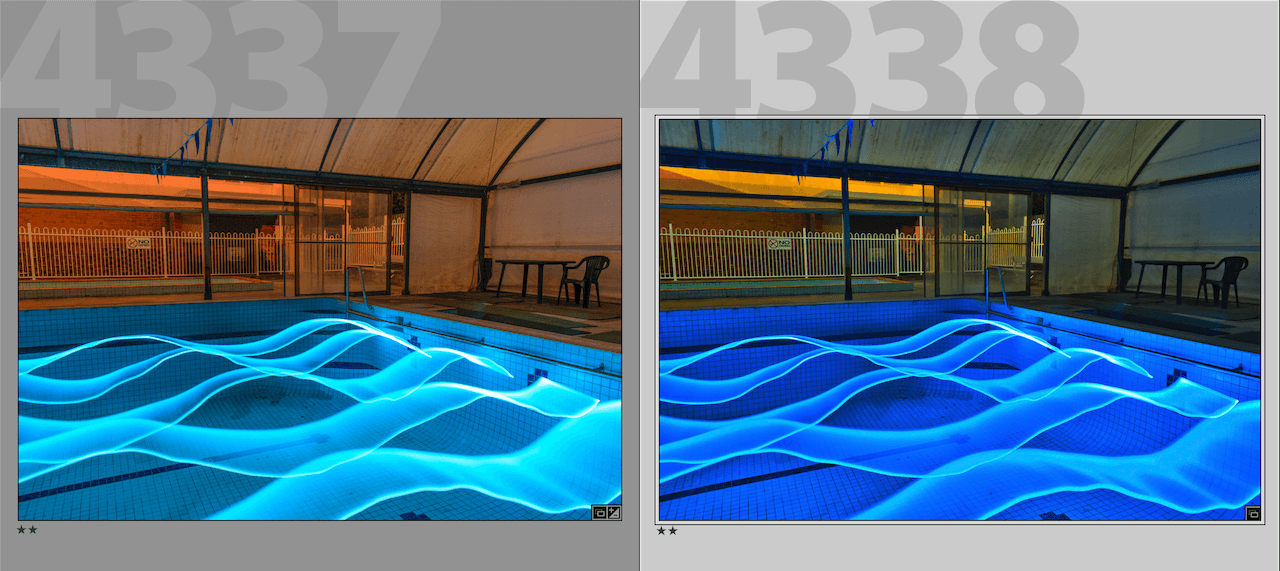
Luminar’s (right) filters including colour cast correction and good highlight recovery which resulted in a more preferable output than the original image processed in Lightroom (left).
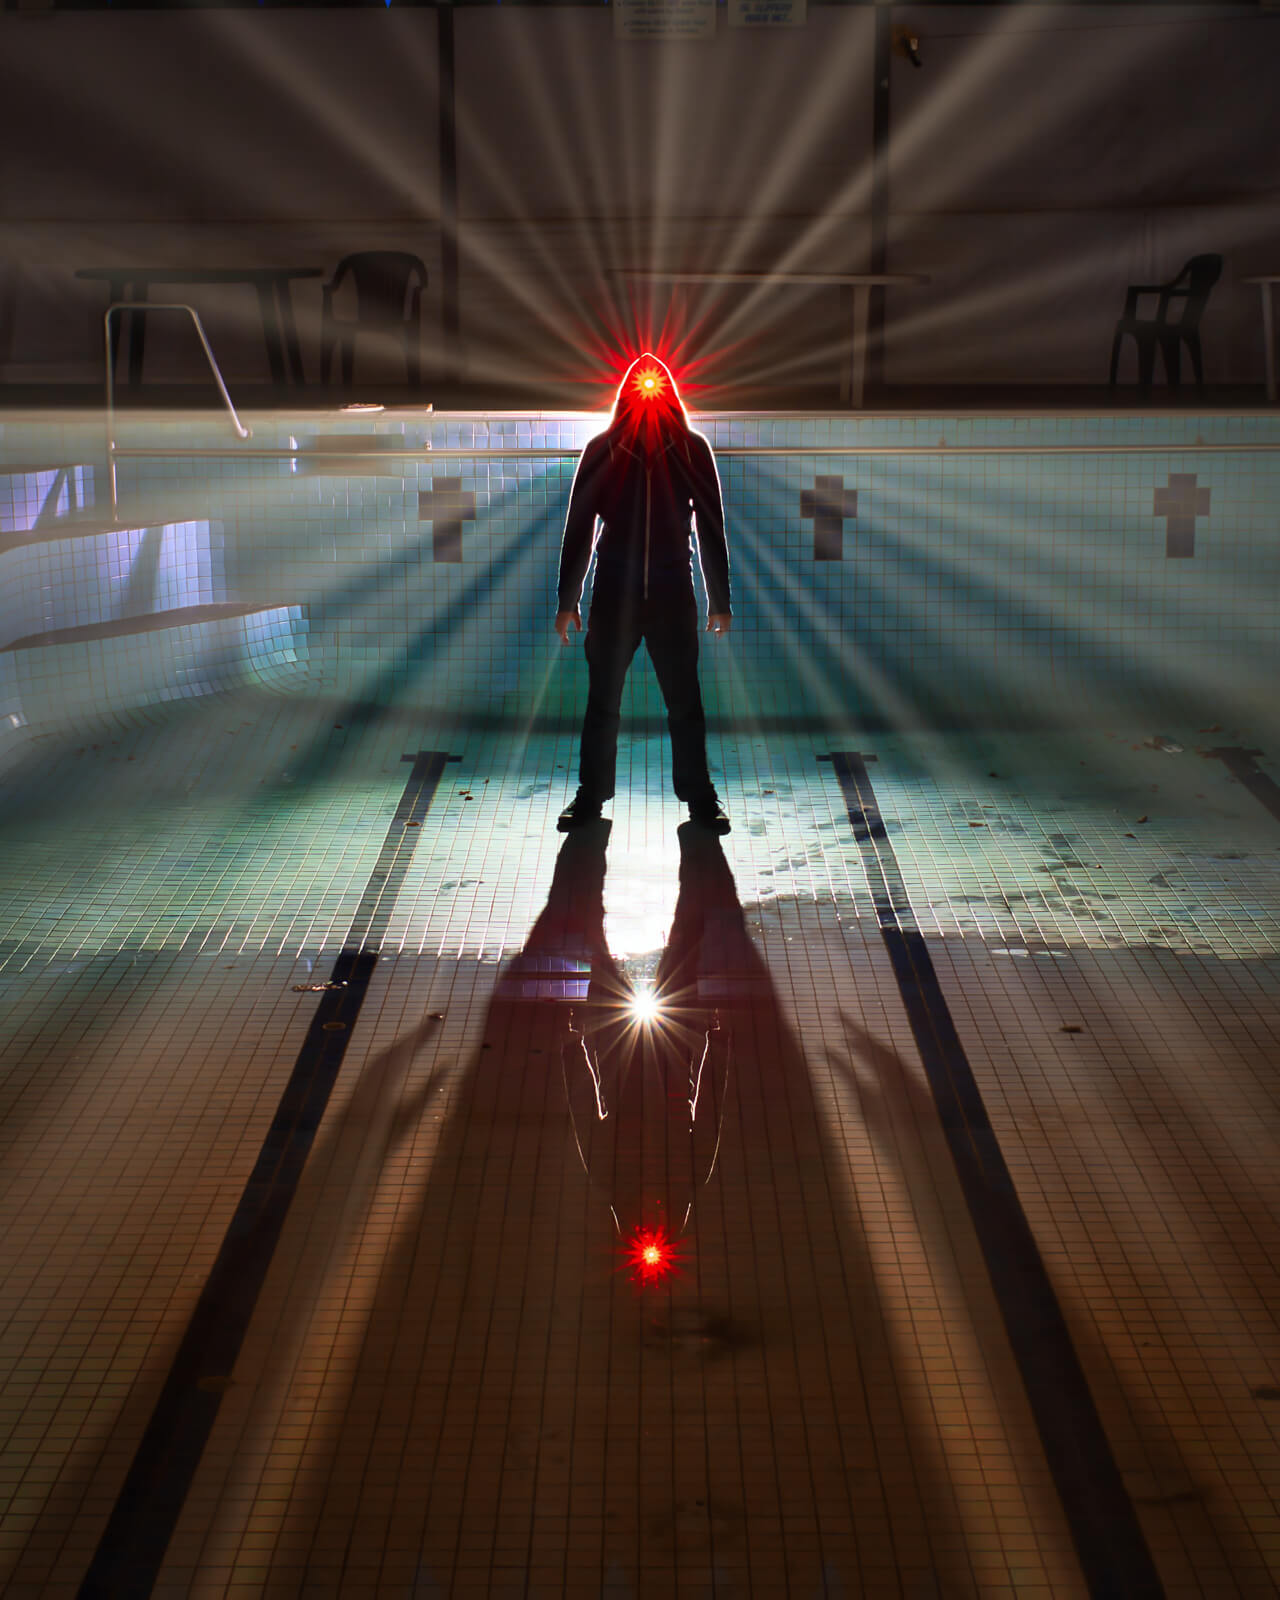
Luminar’s sunrays filter was utilised when post-processing this backlit photo.
Composite image created in Luminar.
ON1 Photo RAW
ON1 Photo RAW has also had a lot of recent improvements. Just like Luminar, it is easy to get it to find your existing photo library. There is plenty of training material available online to assist with the learning curve. ON1 also has lots of display layouts that you also change on the fly during different parts of the post processing workflow.
ON1 has a large library of presets, but I found that most were not useful for light painting. In fact, on only one photo during the trial did I find that a preset (HDR filter) managed to get a better result than processing manually in Lightroom (apart from terrible noise reduction).
ON1 has a good, but not brilliant selection of develop filters (though I particularly like the blur filter which has lots of different options). These can be applied locally using various mask options including AI Mask, Masking Brush, and Masking Bug by clicking the photo shaped icon to the left of the filter name once selected (I had to read the manual to work that out). Confusingly the Local button (from the left hand toolbar) has limited adjustment options. ON1 does however have some useful refine, chisel brush and faces filters, which may be very useful for portrait photographers. In the majority of cases I struggled to get photos I was happy with with ON1 photo RAW. I personally don’t think that its RAW processing engine works well for many light painting use cases. However as we all have different tastes in how post processed images appear, other may have a different opinion. I had no issues with RAW developing daytime photos. To make things worse, the de-noise is very poor, doing very little to eliminate noise which occurs often in low light situations. There is also no double click back to zero functionality, as found in Lightroom and Luminar. The spot removal tools were found to not be as accurate as Lightroom’s. On the good side, it is possible to get ON1 Photo RAW to automatically detect and remove hot pixels, something that was sadly removed from Lightroom many years ago.
As with Luminar, ON1 has layer / composite functionality. The edge aware mask, AI quick mask, an excellent range of blend options, and easier user interface makes this my preferred option for making composite images over Luminar. Text can also be added to an image, which removes the need for using seperate graphics software if you want to annotate an image.
Unfortunately performance was too sluggish for my liking when making adjustments. In some cases, including just opening up the file browser, performance was slow slow that I had to quit the application and re-start. I also experienced a few bugs, and one crash.
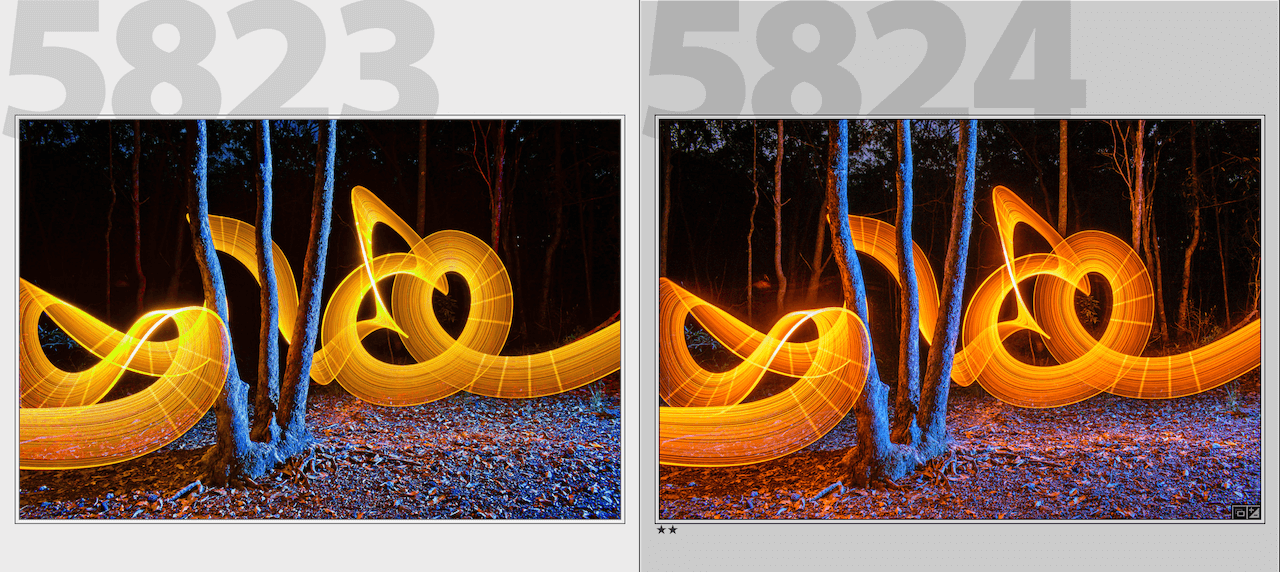
Despite considerable slider adjustments, I could not get ON1’s output (left) to match my preferred image from Lightroom (right).

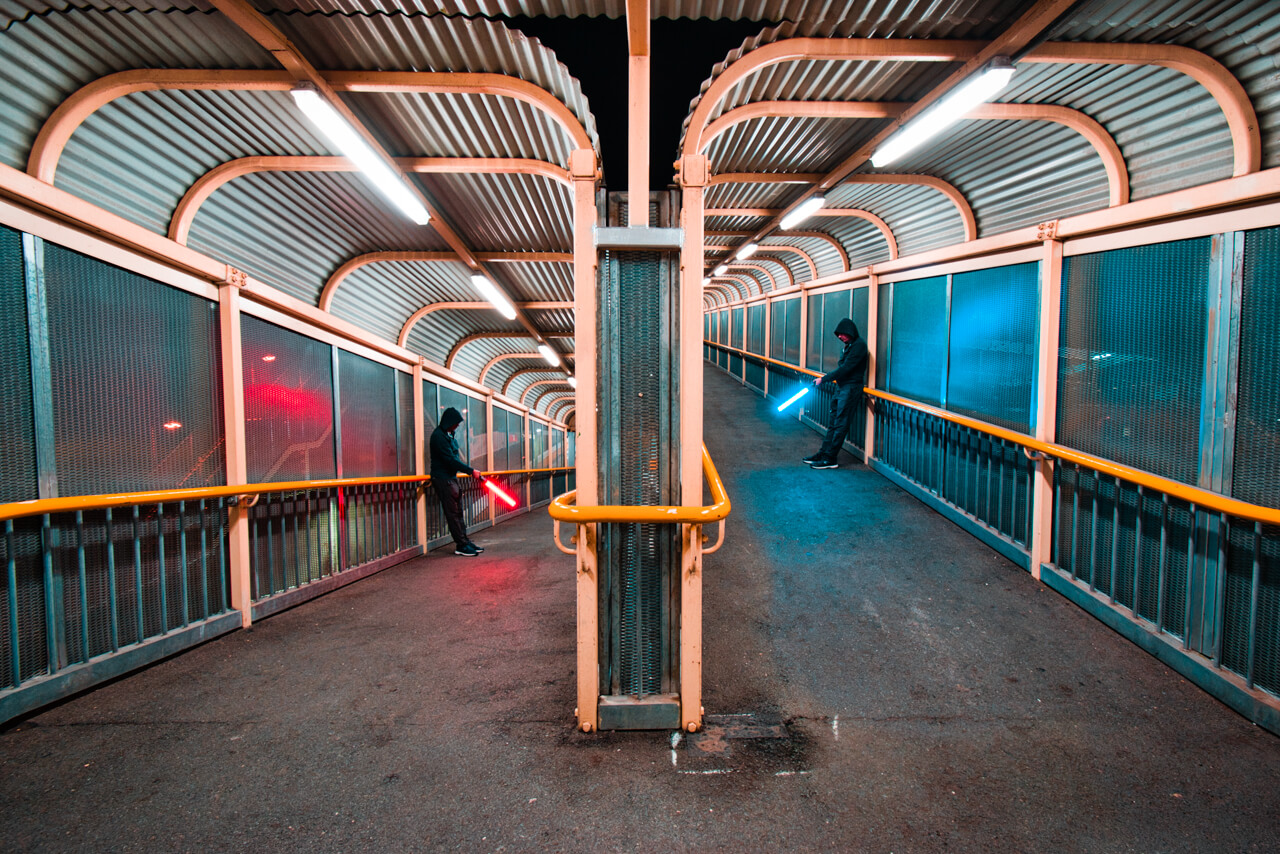
Composite image created using ON1 (and Lens Distortions).
Conclusion
Both ON1 Photo RAW and Skylum Luminar are cheaper to purchase than Lightroom (even if you have to pay for a new/updated version each year compared to Lightroom’s subscription model). As with the Lightroom/Photoshop combination (which may not last forever at the current price), they also have integrated layers / composite functionality, but in this case actually inbuilt into the RAW processing workflow.
Which would I recommend? In my opinion, Luminar is by far the better of the two applications for light painting photographers. When it comes to RAW processing, I found Luminar could get results close to, or even better than Lightroom, and in some cases much quicker. Noise reduction could be improved. I struggled to get good results for light painting photos with ON1 Photo RAW, and noise reduction was inadequate. However, I preferred ON1 Photo RAW for using layers, plus ON1 Photo RAW has more edge aware and intelligent masking options.
When my old standalone Lightroom 6 ceases to meet my requirements (either due to OS compatibility, or purchasing a new camera or laptop), then I will be seriously considering moving from Lightroom to Skylum Luminar for RAW processing. As both applications have trial options, then I would advise trialling before purchasing. Other RAW editing options to consider include DXO PhotoLab, Capture One (which can be quite pricey), or the free Darktable, or RawTherapee.
Product Links:
Skylum Luminar 10% off with code: LIGHTPB10
ON1 Photo RAW (no discount code was available)


Lovely review Stephen! These photos look stunning too, i am always interested in learning ways to minimise the editing time. post processing can be very time consuming.
As always a great review, at the moment the only post processing I do is with the free software that came with my Canon 5d Mark IV, Digital Photo Professional 4. It has served me well so far as I only do photography for my own pleasure & don’t want to spend hours post processing, but I know at some stage I will have to move forward, Most people I know use LR but a few use Luminar, I have great respect for your reviews as they have helped me make good decisions in the past, especially for torches. I will look into Luminar & try a trial. Many thanks again for this review.
You’ll be able to do a lot more in Skylum Luminar than in the RAW software supplied with the camera.